Azure Premium SSD v1 to v2: cut disk costs 21-73%
Published · Updated · OhChimp Engineering
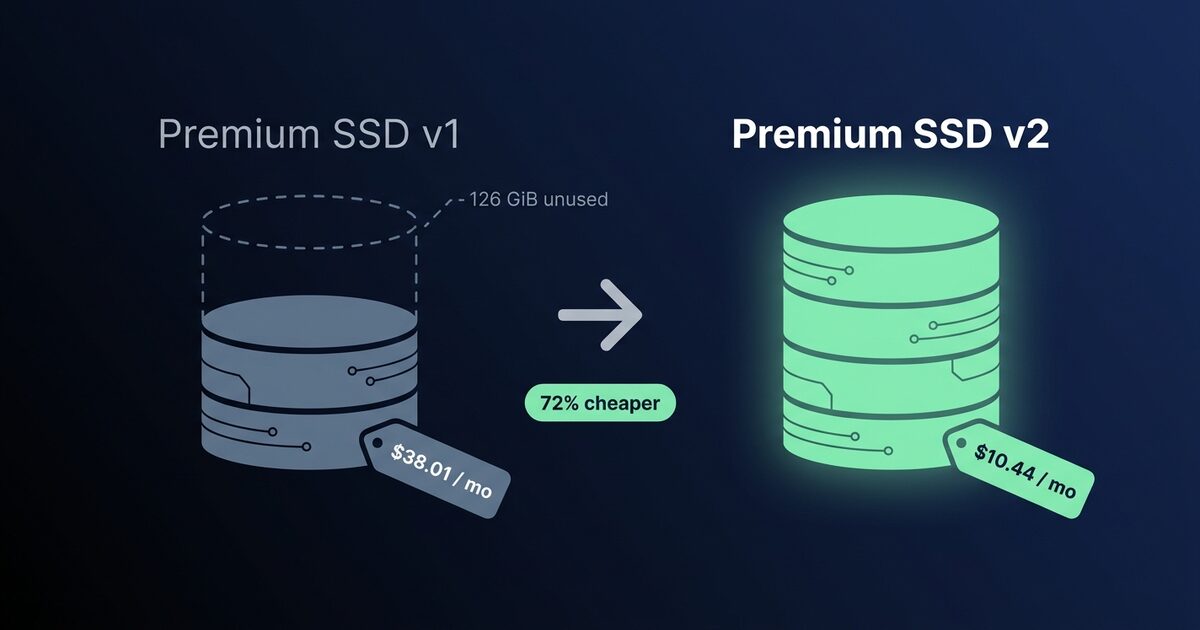
Two Azure data disks, two GiB apart in size, save wildly different amounts when you move them to Premium SSD v2. The 128 GiB one saves 48% and the 130 GiB one saves 73%. That gap comes from a billing rule Microsoft documents in a single sentence, and almost nobody prices in before they migrate.
Why Premium SSD v2 costs less than Premium SSD
Premium SSD v1 sells capacity in fourteen fixed tiers, P1 through P80. Each tier is a fixed size with a fixed price and a fixed performance bundle. You pick a capacity, Azure rounds it up to the next tier, and that tier is what lands on your invoice.
Premium SSD v2 drops the tiers. Capacity runs from 1 GiB to 64 TiB in 1 GiB increments, billed per GiB. In East US that rate is $0.0803 per GiB-month. Every v2 disk also arrives with 3,000 IOPS and 125 MB/s included at no charge, and you buy performance above that separately.
Put a 128 GiB disk on both and the shape of the change is obvious.
| Premium SSD v1 (P10) | Premium SSD v2 | |
|---|---|---|
| Billed capacity | 128 GiB | 128 GiB |
| Monthly cost | $19.71 | $10.28 |
| Included IOPS | 500 | 3,000 |
| Included throughput | 100 MB/s | 125 MB/s |
Premium SSD v2 is half the price with six times the IOPS. The P10 tier prices a slot in a price list, and the performance that comes with the slot is worse than what v2 gives away.
Those v2 rates arrive from Azure's retail price API as hourly meters, so they look nothing like the monthly figures when you go to check them yourself. Capacity is $0.00011 per GiB-hour, provisioned IOPS above the free 3,000 is $0.000007 per IOPS-hour, and provisioned throughput above the free 125 MB/s is $0.000055 per MB/s-hour. Multiply by 730 hours and you get $0.0803, $0.00511 and $0.04015 per month. Every dollar figure below is built from those three numbers and the published P-tier prices, all East US, all LRS, all read from the managed disk pricing page and the retail price API on 21 August 2026. Your region will differ, so re-run the numbers against your own before you take them to anyone.
Why the saving is a sawtooth
Microsoft states the rounding rule plainly in its managed disk billing documentation: managed disks are billed according to their provisioned size, and Azure maps that size, rounded up, to the nearest offered disk size. The example they give is a 200 GiB Standard SSD billing as E15, which is 256 GiB.
Premium SSD v1 works the same way. Provision 130 GiB and you have bought P15. P15 is 256 GiB and costs $38.01 a month. You are paying for 126 GiB that your operating system will never show you.
So the saving from moving to v2 depends entirely on where the disk sits inside its tier.
| Provisioned | Billed tier | Billed GiB | v1 $/mo | v2 $/mo | Saving |
|---|---|---|---|---|---|
| 100 GiB | P10 | 128 | $19.71 | $8.03 | 59% |
| 128 GiB | P10 | 128 | $19.71 | $10.28 | 48% |
| 130 GiB | P15 | 256 | $38.01 | $10.44 | 73% |
| 200 GiB | P15 | 256 | $38.01 | $16.06 | 58% |
| 256 GiB | P15 | 256 | $38.01 | $20.56 | 46% |
| 300 GiB | P20 | 512 | $73.22 | $24.09 | 67% |
| 512 GiB | P20 | 512 | $73.22 | $41.11 | 44% |
Read down the Saving column and it climbs, falls, climbs, falls. The saving peaks immediately after a tier boundary and decays as the disk grows toward the next one. A disk sitting exactly on a boundary is paying for every GiB it holds, so it only collects the per-GiB rate difference, and through P20 that floor is around 44 to 48%.
Somebody expanded that disk from 128 GiB to 130 GiB, probably to clear a full-filesystem alert, and the monthly bill went from $19.71 to $38.01. Two GiB of headroom cost $18.30 a month, forever, and no alert fired about it.
That is also the sorting key for your migration. Rank candidates by wasted GiB, meaning billed capacity minus provisioned capacity, rather than by disk size. The 130 GiB disk with 126 GiB of padding is a better first move than a 512 GiB disk with none.
Where the saving shrinks: P20 and up
The tier bundles performance along with capacity, and from P20 upward that bundle starts beating what v2 hands you for free.
P20 carries 2,300 IOPS and 150 MB/s. A default v2 disk gives you 3,000 IOPS and 125 MB/s, so the IOPS improve and the throughput drops by 25 MB/s. Buying that back costs 25 times $0.04015, which is exactly $1.00 a month.
P30 is where it gets expensive, bundling 5,000 IOPS and 200 MB/s. Matching that on v2 means 2,000 extra IOPS at $10.22 and 75 extra MB/s at $3.01, so $13.23 a month on top of the capacity charge.
| Provisioned | Tier | v1 bundle | v1 $/mo | v2 capacity only | v2 matched | Real saving |
|---|---|---|---|---|---|---|
| 300 GiB | P20 | 2,300 IOPS / 150 MB/s | $73.22 | $24.09 | $25.09 | 66% |
| 512 GiB | P20 | 2,300 IOPS / 150 MB/s | $73.22 | $41.11 | $42.12 | 42% |
| 600 GiB | P30 | 5,000 IOPS / 200 MB/s | $135.17 | $48.18 | $61.41 | 55% |
| 1,024 GiB | P30 | 5,000 IOPS / 200 MB/s | $135.17 | $82.23 | $95.46 | 29% |
Compare the last two columns in the bottom row. Price a 1,024 GiB disk on capacity alone and you will report a 39% saving to whoever signs off on the change. With the performance matched, the honest figure is 29%. Ten percentage points of a savings estimate walk out the door if you forget that v2 meters IOPS and throughput separately.
Those rows stop at 1,024 GiB, and the squeeze carries on above them.
| Provisioned | Tier | v1 bundle | v1 $/mo | v2 capacity only | v2 matched | Real saving |
|---|---|---|---|---|---|---|
| 2,048 GiB | P40 | 7,500 IOPS / 250 MB/s | $259.05 | $164.45 | $192.47 | 26% |
| 4,096 GiB | P50 | 7,500 IOPS / 250 MB/s | $495.57 | $328.91 | $356.92 | 28% |
| 8,192 GiB | P60 | 16,000 IOPS / 500 MB/s | $946.08 | $657.82 | $739.30 | 22% |
| 16,384 GiB | P70 | 18,000 IOPS / 750 MB/s | $1,802.06 | $1,315.64 | $1,417.38 | 21% |
| 32,767 GiB | P80 | 20,000 IOPS / 900 MB/s | $3,604.11 | $2,631.19 | $2,749.18 | 24% |
Every row there sits exactly on its boundary, so none of them hold padding to recover. What is left is the per-GiB rate difference minus the performance you buy back, and the rate difference is the half that shrinks on you. Premium SSD v1 works out to about $0.154 a GiB at P10 and about $0.110 a GiB at P70 and P80, while Premium SSD v2 charges a flat $0.0803 everywhere. So the gap funding the whole migration is 48% wide at P10 and 27% wide at the top, and the buy-back comes out of what remains.
Premium SSD v2 also caps the throughput you can set at 0.25 MB/s for every provisioned IOPS, so a P80's bundled 900 MB/s needs at least 3,600 IOPS underneath it. A P80 workload that uses the throughput and none of the IOPS still cannot sit on the free 3,000.
Across all fourteen tiers the floor is about 21%, and the saving never inverts. Two things can still make a specific disk the wrong candidate.
The first is a workload that genuinely uses the bundled performance. Pull the disk's real IOPS and throughput from Azure Monitor before you size the replacement, because most disks never touch the ceiling their tier handed them. Sizing v2 to observed usage rather than to the old tier is usually where the extra saving hides.
The second is a disk reservation. Azure sells one-year reservations for Premium SSD tiers from P30 up, and Premium SSD v2 has no reservation offer at all. A one-year P30 reservation prices the year at $1,541.00 against $1,622.04 at list, so about 5% off, or $128.42 a month effective. A matched v2 disk at $95.46 still beats that by 26%, so the money argument holds. You would be walking away from a term you already paid for, which is a conversation with finance rather than a technical decision.
The cheapest GiB is the one you never allocate. If the disk backs a Postgres instance, check whether unused indexes are inflating it before you pick the replacement size. The same tier-to-linear move exists on the other two clouds if you run them, between gp2 and gp3 on AWS and between pd-ssd and pd-balanced on GCP.
Find your Premium SSD v1 candidates by hand
az disk list wants a resource group, so sweeping a whole estate with it means a loop over every group in every subscription. Azure Resource Graph answers the same question in one call against a pre-indexed copy of your resource metadata. The stopped VM guide covers installing the extension, and it is one command.
az extension add --name resource-graphThis query finds every attached Premium SSD v1 data disk, works out the tier it bills at, and sorts by the capacity you are paying for and cannot use.
az graph query -q "
resources
| where type =~ 'microsoft.compute/disks'
| where tostring(sku.name) in ('Premium_LRS', 'Premium_ZRS')
| extend gib = toint(properties.diskSizeGB),
         state = tostring(properties.diskState),
         iops = toint(properties.diskIOPSReadWrite),
         mbps = toint(properties.diskMBpsReadWrite)
| where state == 'Attached'
| extend billedGib = case(gib <= 4, 4, gib <= 8, 8, gib <= 16, 16, gib <= 32, 32,
                          gib <= 64, 64, gib <= 128, 128, gib <= 256, 256,
                          gib <= 512, 512, gib <= 1024, 1024, gib <= 2048, 2048,
                          gib <= 4096, 4096, gib <= 8192, 8192, gib <= 16384, 16384,
                          32767)
| extend wastedGib = billedGib - gib
| project name, resourceGroup, subscriptionId, gib, billedGib, wastedGib, iops, mbps,
          zone = tostring(zones[0])
| order by wastedGib desc
" --output table
Two spellings decide whether this returns your estate or an empty table. sku is a top level column on the Resource Graph row, so it is sku.name and never properties.sku.name. Capacity is properties.diskSizeGB with a capital G and a capital B, and a lowercase diskSizeGb returns null for every disk, which sorts quietly to the bottom instead of raising anything.
The ladder needs all fourteen rungs. Premium SSD v1 runs from P1 at 4 GiB to P80 at 32,767 GiB, and a case() that stops early stays just as quiet. It hands every missing tier the last value in the list, so an 8,192 GiB P60 disk comes back billed at 4,096 GiB with a wastedGib of minus 4,096. Sorted descending, the most expensive disks you own land underneath every disk that has nothing to recover.
Now split the results on the performance question, because that is where the two piles diverge.
az graph query -q "
resources
| where type =~ 'microsoft.compute/disks'
| where tostring(sku.name) in ('Premium_LRS', 'Premium_ZRS')
| extend gib = toint(properties.diskSizeGB),
         iops = toint(properties.diskIOPSReadWrite),
         mbps = toint(properties.diskMBpsReadWrite),
         state = tostring(properties.diskState)
| where state == 'Attached'
| extend needsTopUp = iops > 3000 or mbps > 125
| summarize disks = count(), totalGib = sum(gib) by needsTopUp
" --output table
needsTopUp false is your easy pile. Those disks land on v2 with equal or better performance and no paid top-up, so the whole per-GiB difference is yours. needsTopUp true is the P20-and-above group, where you price the buy-back first.
The disk being attached is what makes it a migration candidate rather than a deletion candidate. An unattached Premium SSD v1 disk is a different and much better conversation, because deleting it saves 100%.
Premium SSD v2 is not in every region, and inside a region it is not in every zone, so check both before you plan anything.
az vm list-skus --resource-type disks \
  --query "[?name=='PremiumV2_LRS'].{Region:locationInfo[0].location, Zones:locationInfo[0].zones}" \
  --output table
In most regions with availability zones you can only attach a v2 disk to a zonal VM, so a VM deployed with no zone will refuse the disk. Check the zones[0] column from the first query against this list.
Convert in place, and keep a way back
Azure supports changing an existing disk's SKU straight to PremiumV2_LRS, the same way you would move between Premium and Standard SSD. The conversion needs the VM restarted, so it goes in a maintenance window.
Before the SKU change, the disk has to satisfy a checklist. Microsoft's conversion guide has the full set, and these are the ones that catch people: it cannot be an OS disk, host caching has to be set to None, on-demand bursting has to be off, double encryption has to be downgraded to single, a shared disk has to be detached from every VM, and a disk created from an Azure Compute Gallery image cannot be converted at all.
Host caching matters beyond the paperwork. Premium SSD v1 can serve reads from the VM's local cache, and Premium SSD v2 does not support host caching in any mode. If a read-heavy disk is running with ReadOnly caching today, turning caching off moves those reads onto the disk itself. Measure the workload with caching disabled and the disk still on v1, before you change the SKU, so you can tell a caching regression apart from a tier regression.
Find the LUN, then turn caching off.
az vm show -g myResourceGroup -n myVM \
  --query "storageProfile.dataDisks[].{name:name,lun:lun,caching:caching}" \
  --output table

az vm update -g myResourceGroup -n myVM --disk-caching 0=None
Bursting comes off the disk itself. If you enabled it within the last twelve hours, Azure refuses to disable it until the thirteenth hour.
az disk update -g myResourceGroup -n myDataDisk --enable-bursting falseTake an incremental snapshot next, before the conversion rather than after, because that snapshot is your only way back.
az snapshot create -g myResourceGroup -n myDataDisk-pre-v2 \
  --source myDataDisk --incremental true
Then deallocate, change the SKU, and start the VM again.
az vm deallocate -g myResourceGroup -n myVM

az disk update -g myResourceGroup -n myDataDisk --sku PremiumV2_LRS

az vm start -g myResourceGroup -n myVM
The disk performs below its target while Azure works through the conversion in the background, and you can watch that finish.
az disk show -g myResourceGroup -n myDataDisk --query [completionPercent] -o tsvOnce it completes, tune performance to what the workload actually needs. A P20 disk that wants its old 150 MB/s back costs a dollar a month to restore.
az disk update -g myResourceGroup -n myDataDisk \
  --disk-iops-read-write 3000 \
  --disk-mbps-read-write 150
The SKU change runs one way. Microsoft's guide states that you cannot directly switch a Premium SSD v2 to another disk type, and that going back means migrating with snapshots. There is no az disk update --sku Premium_LRS waiting for you on the other side.
Rolling back means creating a fresh Premium SSD v1 disk from the snapshot you took first, then swapping it in.
az disk create -g myResourceGroup -n myDataDisk-restored \
  --source myDataDisk-pre-v2 --sku Premium_LRS

az vm disk detach -g myResourceGroup --vm-name myVM -n myDataDisk
az vm disk attach -g myResourceGroup --vm-name myVM -n myDataDisk-restored
If you would rather never be in that position, skip the in-place route entirely and migrate through the snapshot in the first place. Create the v2 disk from the incremental snapshot, attach it, verify, and leave the original v1 disk sitting there untouched until you are happy. Existing disks convert only to 512 byte sector size, so pass that explicitly, and pin the new disk to the same zone as the VM.
az disk create -g myResourceGroup -n myDataDisk-v2 \
  --source myDataDisk-pre-v2 \
  --sku PremiumV2_LRS \
  --logical-sector-size 512 \
  --zone 1 \
  --size-gb 130 \
  --disk-iops-read-write 3000 \
  --disk-mbps-read-write 125
That route costs you the snapshot storage and a second disk for a few days, and buys you a rollback that is a detach and an attach instead of a restore.
Two rate limits shape how fast you can roll this out. A disk's type can only change twice in a day. A v2 disk's performance can only change four times in 24 hours, and creating the disk spends one of those four, so a new disk has three adjustments left on its first day. Convert one representative disk, let the workload run against it for a day, then move the rest of the easy pile.
A disk whose SKU you changed by hand now disagrees with the azurerm_managed_disk resource that created it, and the next apply will read your migration as drift and put the disk back on Premium_LRS. Change the code in the same pull request as the migration. That failure mode is its own kind of expensive, because the apply throws no error and the bill goes back to where it was.
A quick decision tree
graph TD
  A[Attached Premium SSD v1 data disk] --> B{Region and zone support PremiumV2_LRS?}
  B -- No --> C[Leave on v1, recheck regional availability later]
  B -- Yes --> D{Bundled IOPS above 3000 or throughput above 125 MB/s?}
  D -- No --> E[Easy pile: snapshot, convert, keep the full per-GiB saving]
  D -- Yes --> F{Azure Monitor shows the workload using that headroom?}
  F -- No --> G[Convert and size v2 to observed usage]
  F -- Yes --> H{Disk covered by a P30+ reservation?}
  H -- No --> I[Convert and buy back IOPS and throughput, recheck the math]
  H -- Yes --> J[Price against the reserved rate before breaking the term]
Common questions
Is Premium SSD v2 cheaper than Premium SSD?
Yes, at every size, though the margin swings a lot. Premium SSD v1 bills the fixed size tier your disk rounds up into, while Premium SSD v2 bills the exact GiB you provisioned at $0.0803 per GiB-month in East US. A disk sitting just above a tier boundary saves the most, around 73%, because most of what it pays for on v1 is padding. A disk sitting exactly on a P10 or P20 boundary saves 44 to 48%. The floor is at the top of the ladder, where a 16,384 GiB P70 disk with its performance matched saves 21%.
Why does my 130 GiB Azure disk cost the same as a 256 GiB one?
Because it is a 256 GiB disk as far as billing is concerned. Azure maps a managed disk's provisioned size up to the nearest offered tier, so 130 GiB lands on P15, which is 256 GiB and $38.01 a month. Growing that disk from 128 GiB to 130 GiB crossed the P10 boundary and nearly doubled its cost, with no warning attached to the resize.
Can I convert a Premium SSD to Premium SSD v2 in place?
Yes. az disk update --sku PremiumV2_LRS changes the SKU on an existing disk, and the VM has to be deallocated and restarted around it. The disk has to clear a checklist first: it cannot be an OS disk, host caching must be None, on-demand bursting must be disabled, double encryption must be downgraded to single encryption, and a shared disk must be detached from every VM.
Can I roll back from Premium SSD v2 to Premium SSD?
Not with a SKU change. Microsoft documents that a Premium SSD v2 cannot be switched directly to another disk type, so the way back is an incremental snapshot and a new disk. Take that snapshot before you convert, because a snapshot of the v2 disk restores to another v2 disk.
Does Premium SSD v2 support host caching?
No, in any mode. Premium SSD v1 disks running with ReadOnly caching are serving some of their reads from the VM's local cache today, and those reads move onto the disk after the migration. Azure requires you to set caching to None before the conversion anyway, so make that change first and measure the workload while the disk is still on v1.
How much do IOPS and throughput cost on Premium SSD v2?
Every v2 disk includes 3,000 IOPS and 125 MB/s at no charge. Above that, East US charges $0.00511 per IOPS-month and $0.04015 per MB/s-month. Matching a P30's bundled 5,000 IOPS and 200 MB/s therefore costs $13.23 a month, which turns a 39% capacity-only saving into a real 29%.
Is Premium SSD v2 worth it on a multi-terabyte disk?
Yes, though the margin roughly halves. Premium SSD v1 charges less per GiB as its tiers grow, falling from about $0.154 a GiB at P10 to about $0.110 at P70 and P80, while Premium SSD v2 stays at $0.0803 per GiB-month in East US. Buy back a P60's bundled 16,000 IOPS and 500 MB/s on top of that and an 8,192 GiB disk saves 22%, against the 48% a P10 sitting on its boundary collects. Price the specific tier before you promise a number, because these are the disks where the dollars are largest.
Why does my Resource Graph query report negative wasted capacity?
The billed-tier ladder in the query ran out before the disk did. Premium SSD v1 has fourteen sizes and the last three are P60 at 8,192 GiB, P70 at 16,384 GiB and P80 at 32,767 GiB, so a case() expression that ends at 4,096 assigns 4,096 GiB to everything above it. An 8,192 GiB disk then reports minus 4,096 GiB of waste and sorts to the bottom of a descending list. Extend the ladder through 32,767 and those disks come back.
Which Premium SSD v1 disks should I migrate first?
Sort by wasted capacity rather than by disk size. Wasted capacity is the billed tier size minus the provisioned size, and a 130 GiB disk carries 126 GiB of it. Then filter to disks whose bundled IOPS are at or below 3,000 and throughput at or below 125 MB/s, which is everything up to P15. Those convert with equal or better performance and no paid top-up.
Can I use Premium SSD v2 for an OS disk?
No. Premium SSD v2 is data disks only, and it cannot be used with Azure Compute Gallery either. A VM keeps its OS disk on Premium SSD, Standard SSD, or Standard HDD, and only the data disks move.
How OhChimp approaches this
OhChimp reads your managed disks across every subscription, prices each Premium SSD v1 disk at the tier it actually bills at, and skips the ones where the tier's bundled IOPS or throughput already beat what Premium SSD v2 includes for free. It writes a snapshot-and-recreate plan pinned to the source disk's zone, with the rollback command included, so a disk you convert has a way back before you start.
Nothing on the disk moves until you click apply on that plan. OhChimp cannot yet measure what one converted disk saves, so the saving stays an estimate and monitoring ends "Inconclusive" rather than VERIFIED.
The Azure integration page covers what OhChimp needs from a subscription to do this.